
So after setting the table out last night I thought I’d give the figures and the rules a run out.
It’s a long post - sorry but hopefully you will enjoy the read and the conclusions.
Live Free or Die are available from Little Wars TV and are based on Andy Callan’s Loose Files and American Scramble and they have sought to ‘modernise’ the original gameplay and they have pretty much succeeded by coincidence a recent copy of Wargames Illustrated had republished Andy’s rules together with his comments on what he would change if he was to write them now.
So armed with copies of both sets I decided to see what ( if anything ) I would tweak.
First thing was I brought back Andy’s variable movement so an average die for Regulars and a D6 for militia for basic moves Cavalry get two dice (3 if charging) (Infantry get two dice if charging) I also added some fixed rate extras so Skirmishers are +3” on the throw, columns are also +3 (+4 on a road).
Both rules work on the accumulation of disorder tokens before casualties are taken, I largely went with the LFD rules although I did add if you throw a 1 on a normal move you get a point. ( For those throwing average dice I just threw a D6 with it). Disorder can quickly accumulate ( crossing fences, rough ground etc. so be careful).
Seemed to work well in the game.
Firing and Melee I left unchanged from the LFD rule set and again it all worked well.
The other tweak I did was around commanders in LFD the army has a C in C and one or more Sub commanders so for Guildford Courthouse both armies get one sub commander alongside the C in C.
The C in C has a fixed number of command points they bring to the army then both they and the sub commanders are rated and have a number of stars. One die per star is thrown and if a 5+ is scored a Command point is added to the total. These characters also bring benefits to units etc and can rally off disorder equal to the number of stars they are rated at ( it costs command points for them to attach to a unit and do this) I like this but felt a bit disappointed Brigade commanders per se weren’t included so in addition to the principal characters I brought in the actual Brigade commanders, they add nothing to command points or to melee etc. But they can rally off one point of disorder from a unit they’re attached to ( costs 1CP to attach). This would be mainly beneficial for militia units as they cannot self rally.
Finally in LFD units ( other than militia) can rally off a number of disorder points if more than 12” from the enemy, the distance seems quite random as I couldn’t understand what it was based on so I changed it to more than 10” which is rifle range.
I think they’re the main points.
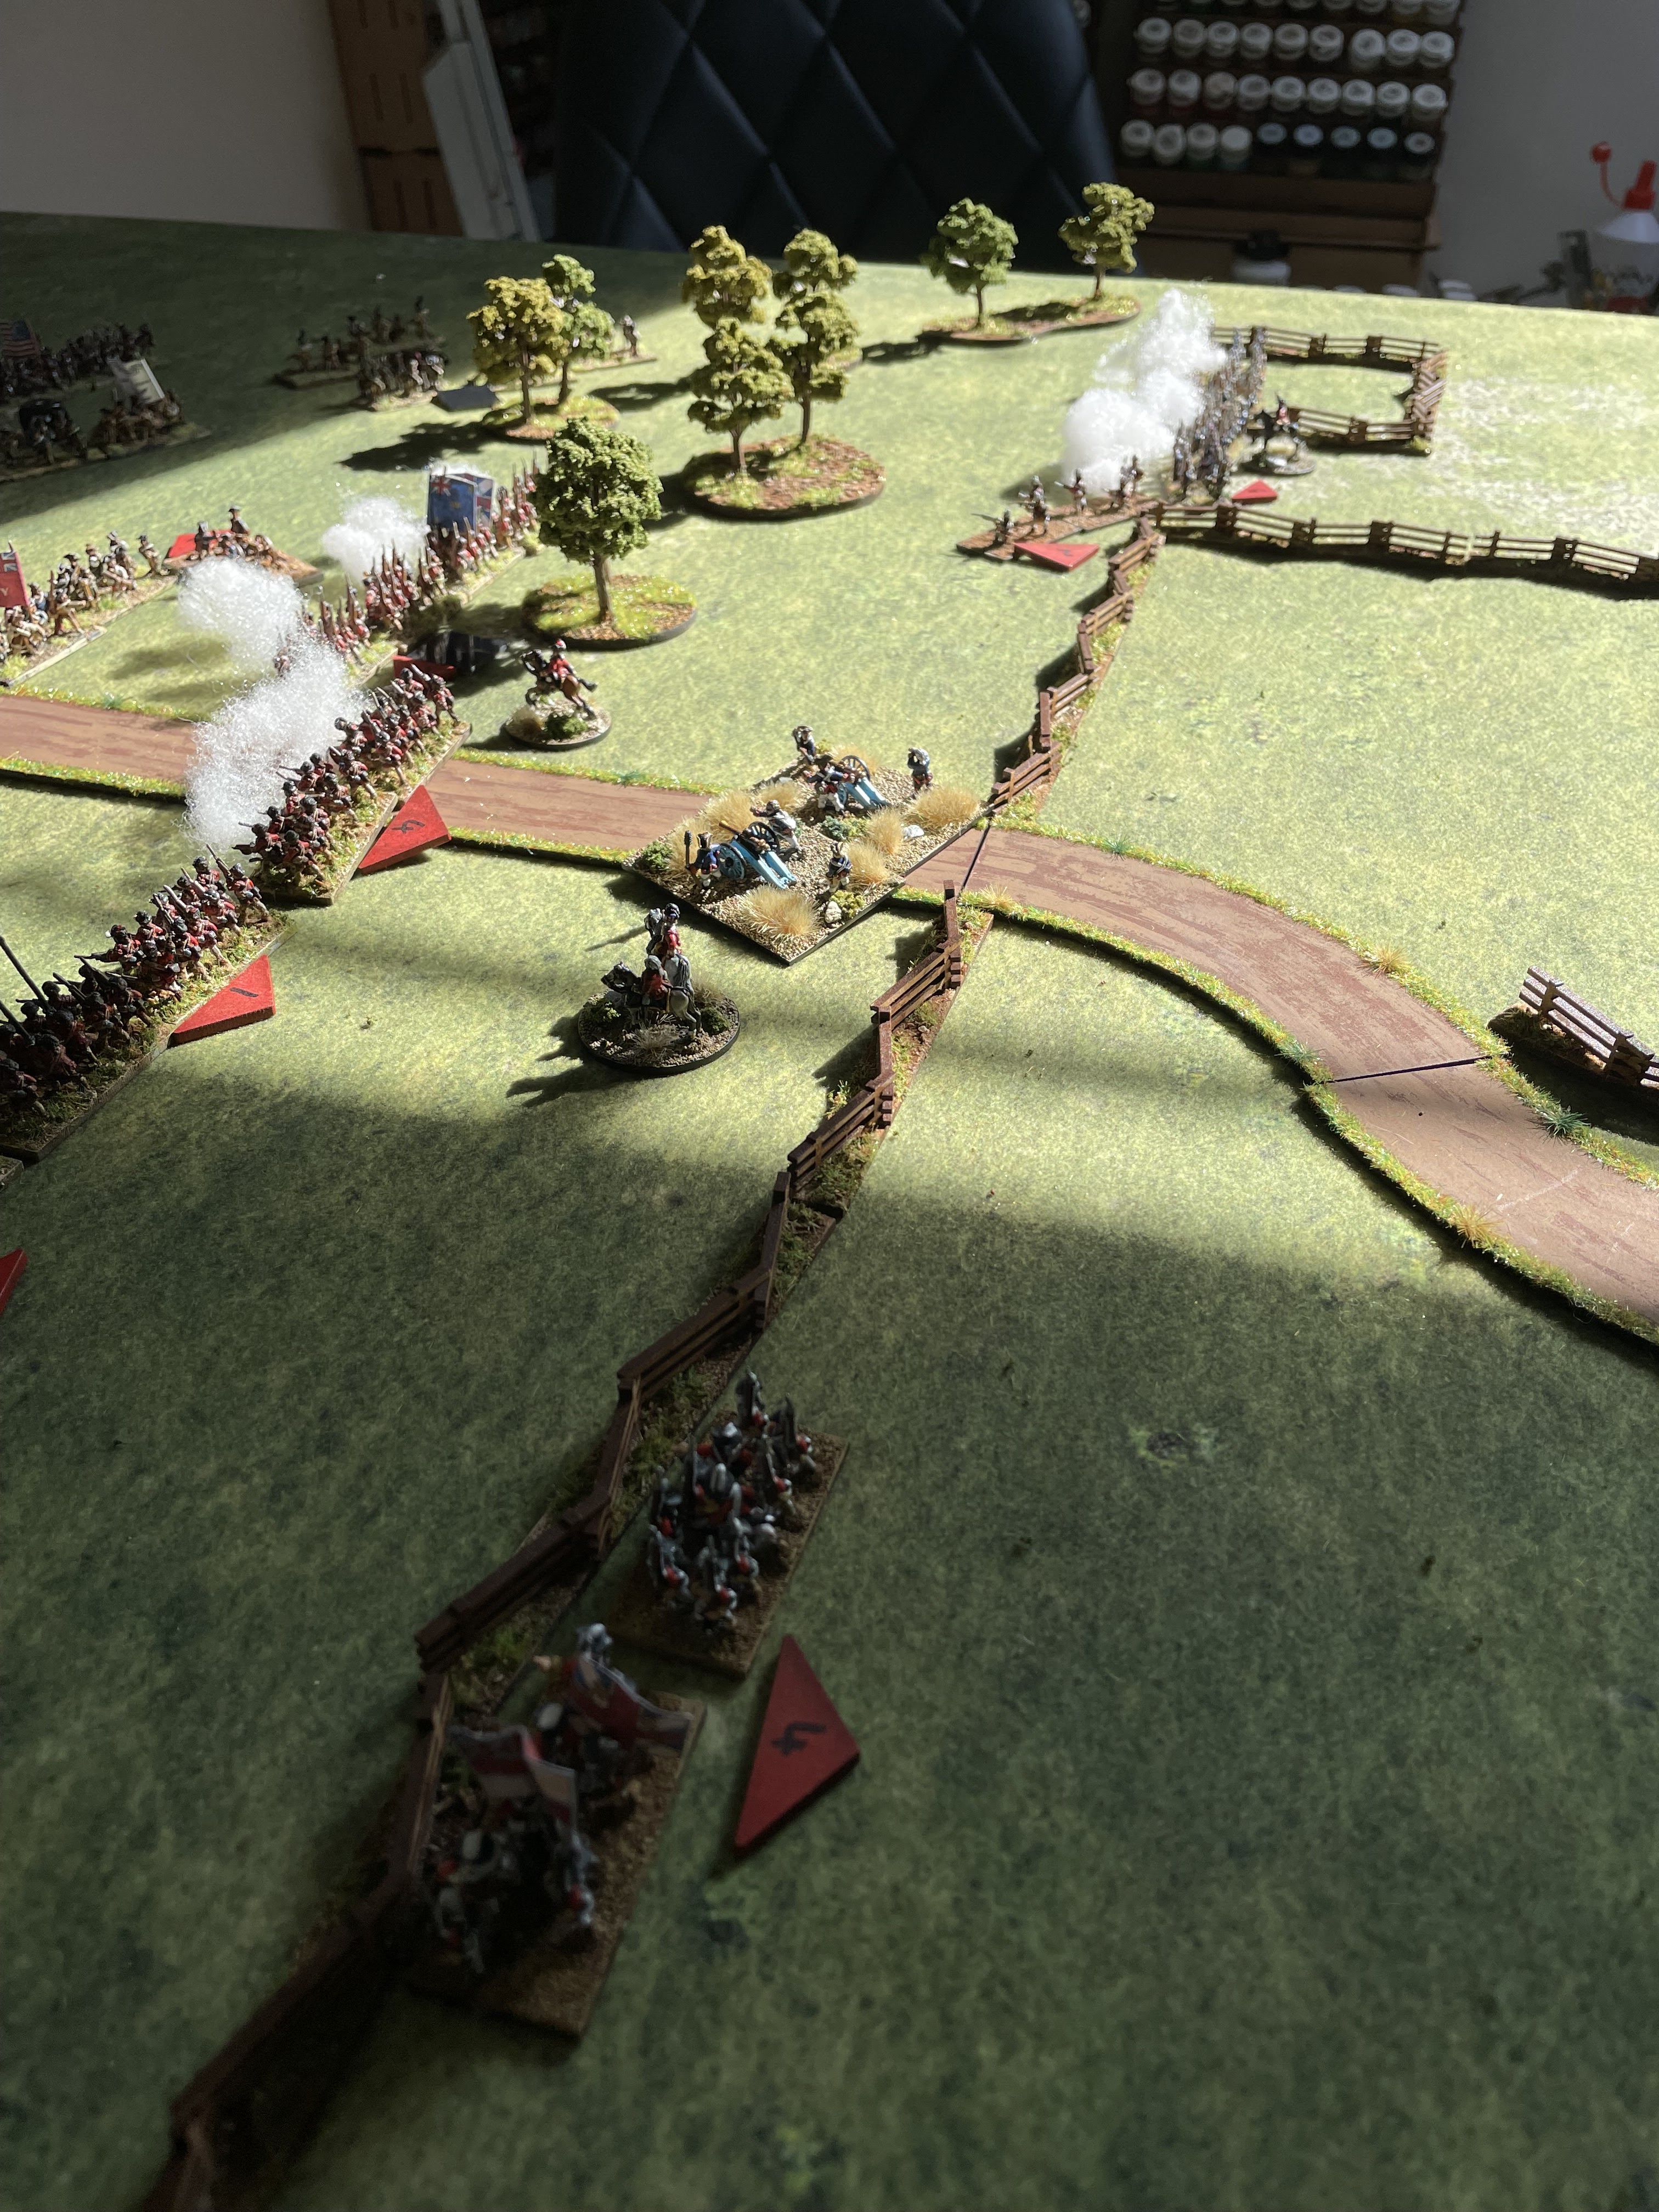
So the table was set


Bounds 3 and 4 sees Butler join the militia on the left at the fence line and rally off a disorder. On the British left the Rifles and the Jaegers exchange fire and with 4 disorders the Hessian Jaegers choose to retire in order to rally. Likewise their opposite number fell back to be out of range of English muskets. On the British right flank Von Bose is advancing incredibly slowly and taking long range hits from the rifles. The British light infantry were stunned when the militia scored 3 hits ( 3x6’s) and again have chosen to retire to rally.
The 71st advance steadily they picked up some disorder crossing the fence line and from the 3 pounder but not enough to cause concern.
The Guards are pushing up the road and to their left the 23rd get closer to the enemy line.
Greene orders the militia from the second line to advance in order to cover the anticipated retreat of the first line and cover the flanks.


Bound 5 and all hell breaks loose
Using half of his available command points Cornwallis orders the 71st to bayonet charge the militia at the fence line, the militia open fire and inflict two hits.
The militia firing on the 23rd inflict 4 hits and receive 3 in return the rifles fail to cause any casualties but Von Bose inflict one on the rifles and continue their ponderous advance.
In the melee the British throw 15 dice needing 5+ and score 8 hits the militia throw 5 dice and they all hit but they still lose the melee and are driven from the fence, they fail their morale check and retreat inflicting 3 disorder points on the militia unit from the second line.


Bound 6 and the action cranks up, Greene joins a militia unit at the fence line and rallies off 3 disorder points, likewise Cornwallis joins the 1st Guards and rallies off two.
Tarleton’s cavalry engage with Washington’s and Lee’s horse despite being outnumbered the Americans put up a strong resistance ( 3 hits each) and the cavalry become engaged in melee.
With a lack of command points to charge the British infantry volley fire wherever they can, the 23rd inflict 4 hits for 1 in return the Guards inflict 3 hits for one in return however the militia are taken over 5 disorder points and lose a base they fail their morale and retreat from the fence. They inflict 3 disorder on the militia unit accompanied by Greene which inflicts a base loss on them. Greene is safe and his presence holds the militia in place.
The 71st lining the fence volley fire on the militia unit accompanied by Lawson 9 hits! They receive 2 in return, Lawson is seriously wounded and falls to the ground and the militia fail their morale retreating 12 inches and lose two bases.
On the British left the 33rd have continued to advance and the Jaegers now rallied are moving back in support
Von Bose on the right seems to be lacking drive.


Bound 7 and Cornwallis is desperate for a breakthrough he needs a little more time to bring the second guards and Grenadiers into line to push through the center.
However the action this turn is on the British left, the 33rd fire a volley onto Stevens militia and inflict a base loss, Stevens falls from his horse dead. However the militia return fire with that from the rifles cause a base loss on the 33rd they throw 3 dice and fail! They must retreat and in doing so give the recently rallied Jaegers 3 points of disorder!
The 23rd and the Guards fire on the militia despite taking more hits Greene avoids being hit and continues to hold them at the fence line although he now realises he must move for his own safety,
The cavalry melee continues but this time Tarleton’s inflicts 4 hits for no loss the rebel cavalry have taken 50% casualties and break, Tarleton’s manages to hold his men in check . The sight of the fleeing cavalry places 3 disorder on the rifles.
Von Bose and the Virginia rifles continue to exchange ineffective fire.


Bounds 8 and 9
Greene had been advancing the continental infantry forward in anticipation of the collapse of the militia and in the hope he could hit the British before they recovered, Huger and his Virginians had advanced further than the Marylanders and they now found themselves in the front line.
Greene had left the last militia unit at the fence line and they now found themselves charged by the 23rd it came as no surprise that the 23rd won but they were lucky out of 15 dice thrown they got two hits but the militia failed to score any so they retreated from the fence and handed the position to the 23rd
The jaegers fire on Hugers continentals and score 3 hits for 1 in return on the right flank the Rifles eventually seek to withdraw as they have no way of reforming being so far forward so eventually Von Bose can advance.


Bound 10 final bound
Tarleton’s had been cautiously advancing his horse round to the left and suddenly found himself with the opportunity to charge the Rifles which he did, receiving two hits on the way in.
In the centre the Guards volley fire on the Continentals and inflict 5 hits ( base lost) but morale good, they return fire 4 hits. To their right the 71st fire on the militia and the 3 pounder they inflict 5 hits on the militia but their morale holds and the 3 pounder takes a hit. Von Bose has eventually advanced and putting pressure on the Rebel left flank.
In the melee Tarleton’s men ride down the rifles for no loss and are now behind the lines.


Game over.
One of my bases is equal to 2 LFD bases and the count at the end was 22 bases lost by the Rebels ( 5 Rifles, 3 cavalry, 13 militia and 1 continental)
British lost 5 bases (1cavalry and 4 line)
However by scenario design it was only a minor victory as the British failed to secure the road exit! An impossible task I think the designers have totally underestimated the time. Bearing in mind they suggest a 6’ board the British would have to advance a full move every move to be able to reach the board edge! Maybe 15 bounds.
So overall I found the game enjoyable, I have seen some very mixed reviews but on returning to them it is clear they haven’t read the rules properly on reviewer saying every game ends with everyone charging and in melee. Bearing in mind it costs 4 command points for 1 British infantry unit to conduct a bayonet charge and 3 command points for anyone else to charge impossible!
So trading movement the best course of action is volley fire but regular on regular will be bloody!
The main issue I have at the moment is the lack of clarity on retreat/ routs, my assumption on the absence of anything else is that after retreating/ routing the unit is able to receive orders now this will result in more command points being used as when units retreat etc they will invariably end up outside of brigade integrity (3”) but it does mean in theory units can fight until the last man and I’m not keen on that so I need to give some thought.
Otherwise I’m pleased with the rules and with the ‘tweaks’ I made, they’re flexible enough to create special rules as and when required the command points system works well and the additional brigadiers whilst making it easier to rally off some disorder it comes at a cost. Likewise using good commanders to join a unit to rally off disorder is very effective but it invariably leaves them exposed. Greene was a very lucky man.
Sorry it’s been a long report but I wanted to try and give a feel for the game play and my thoughts
4 comments:
Okay a lot to chew over there. I’ve had a few issues playing LFD solo, but the issues have not been with the rules they’ve been with my memory of them. Very interesting to see the tweaks that you’ve made. I may borrow a few of them.
An enjoyable read, not a rule set I am overly familiar with so enjoyed reading your take on them.
Fabulous, I have been looking forward to this post. I am going to pull the LF&D rules and the do another re-read.
I do favour random movement, it strikes me that it abstractly deals with a whole host of command and performance factors in one simple place, plus there is always ‘some’ movement, rather than the situation that Black Powder creates, when failed command means no movement …. Not a problem per tutn, but more of an eyebrow raiser when it happens over several consecutive turns with the same unit.
A long report, but a good one and a clear description of the game and rule mechanics in action. It's been a long time since I played Loose Files and I wondered what extra Live Fast gave. I'll take a longer look at the latter now.
Post a Comment