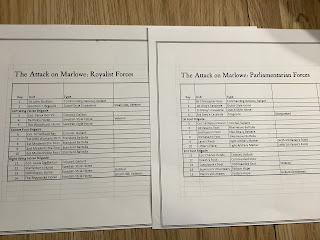
Marlowe to Maidenhythe written by Robert Avery and published by Simon Miller is a fictional Campaign/Scenario book for his His For King or Parliament Rules although the information provided effectively means they can be used for any ECW rules.
I thought therefore it was time I started to test out my ECW armies the majority of which were painted for me by Lee Gramson as part of my Edgehill project. For me it was a no brainier to use the scenarios from the book, there are 12 scenarios in total so more than enough to keep me occupied for a while. The campaign/ scenarios follow the exploits of Sir John Boulters a wealthy mill owner, loyal to the King and his friend, now enemy, Sir Christopher Grey who has declared for Parliament and has therefore declared himself traitor.
Sir John Boulters having raised his force realises that if we’re to take the bridge at Marlowe he will effectively cut Sir Christopher Grey from his support from the South.
The rules I use ‘Remekin ECW’ are available here http://prometheusinaspic.blogspot.com/
Written by Tony Howard they are based on the Command and Colours game system but has the options of replacing the order card with command chits ( this is the system I use) Tony has retained the use of hexes but I decided not to do so using 4” as the equivalent hex distance and writing some house rules for the lack of hexes. Etc.
So onto the game - my regular opponent Steve opted to be the Parliamentarians and I took on the role of Sir John Boulters.
An overview of the battlefield, the Royalist forces can be seen with the infantry advancing in the centre and cavalry on both flanks.
Bound 7. It was time for the Royalists to strike a regiment of foot managed to close with the commanded muskets who took casualties and were forced to retreat across the hedgerows. Col. Derrick continued his sweep to the rear of the Parliamentarian line and the Royalist cavalry on the right had managed to advance gradually posing a serious threat to Sir Christopher.The musketry exchange was still going the way of Parliament with two Royalist regiments now at 50% strength. Sir John brought his Lifeguard forward into the Royalist centre in the hope of exploiting the gap that would shortly open to the the rear of the Forlorn Hope.
Even though the Royalists were restricted in the number of command chits they received it was sufficient for the killer blow. Col. Derrick led his unit of Vet. Horse into the rear of the Parliamentarian green coated regiment, unable to form a stand of pikes the Royalist horse wreaked havoc amongst the foot inflicting close on 60% casualties on the infantry with only minor casualties received. The second unit of horse advanced towards the exposed flank of the commanded shot. Sir John ordered his two battered regiments of foot to hold and try to rally and on the right the Royalist horse crept a little closer preparing to charge.
At this point Steve, sorry Sir Christopher conceded calling upon his men to make good their retreat ( we had run out of time) .
All in all a good game we agreed that the command of forlorn hope, the commanded musketeers and the dismounted dragoons would be lost but saw no reason why the Parliamentarian horse and two regiments of foot would not escape. For the Royalists two of their foot regiments had taken heavy casualties one 50% and one 60% although they were no longer under threat and could try to rally troops.
Overall we really enjoyed the game and didn’t think we needed to change much. As a point of note in the original rules one hit equates to the removal of a base a play two hits and I don’t take bases off just track them with mini dice.
And yes I know I still need to paint the edges of the flags 🤪We are both looking forward to the next match up.


6 comments:
We’ve had good games with this campaign using theFK&P rules. Yours look good.
Excellent looking game and a great batrep. I’m a big fan of Tony’s rules too, interesting to see them played out without hexes, never thought of doing that.
Cool looking Graham.
Willz.
A lovely sized action that unfolded in a very natural way, giving good narrative. The rules look like they have travelled nicely from original to Tony’s rules to open table.
Great looking game, the rules sound like they worked well without using the hexes, good to know!! I like the sound of the scenario book so will have to get my hands on a copy.
The game looks great! Clever to adapt Ramekin to a non-hex playing area. I've played an ECW game with Tony and the rules give a flowing and fun game.
Post a Comment